This seems a bit late – instructions for a peppermint wreath after Christmas, but I don’t have the staff (or the desire!) to make my Christmas ideas in July. 🙂 I’m going to work on timing, but for now, here it is – a Christmas craft after Christmas!
I love making new crafts, but I really don’t like making repeated copies. This was a difficulty with this craft, because I wanted it for my kitchen windows, and I had three. Lo and behold, but as I was working on the first wreath two more magically appeared! It was a Christmas miracle!
Okay, really th girls saw me making mine and were eager to make their own. We had a lot of fun making these while watching a Martha Stewart Holiday DVD. It really got us in a festive mood. They’re super easy. (Stay tuned to the end for a sneaky announcement.)
Make Your Own Peppermint Wreath

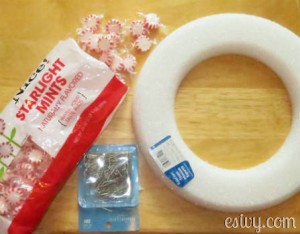
Supplies for a 12-inch wreath
-
-
- 12 inch white foam wreath, label: 11/16 in (thickness) x 2 1/2 (width) x 11 3/4 in (17 mm x 63 mm x 298 mm).
- wrapped peppermints, about 22 oz for a 12 in. wreath*
- 250 – 300 straight pins
- ribbon for hanging.
*I found bags of 21 oz (595 g) of mints and we made three 12 inch wreaths using three bags. One of us had 2 left over, one needed 2 more, and one had 6 left over. Some in each package were broken.
Instructions for DIY Peppermint Wreath
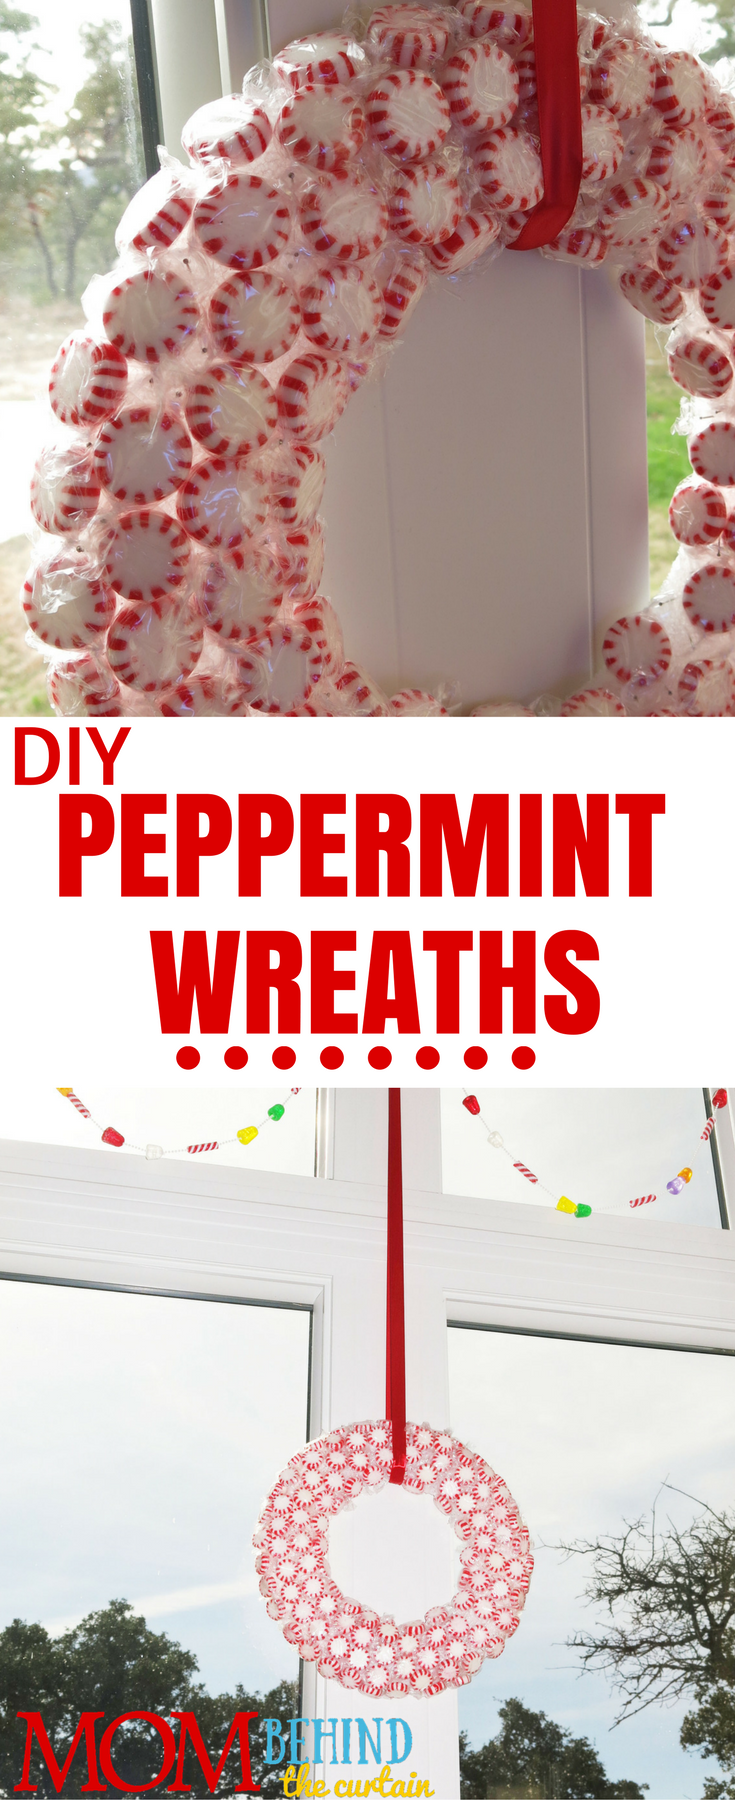
1. Start on the outside edge. Position a mint with the twisty ends going in the same direction as the circle of the wreath (rather than pointing to the center).

2. Pin the mint to the wreath with a pin through each of the twisty ends.3. Continue across the wreath in a row to the center, it should take 4 mints. You won’t quite cover the inside edge, but that’s fine.
4. For the second row, start at the center and kind of work the mints into the gaps for the first row.

5. Continue around the wreath until it’s completely covered. More tips and tricks follow below.
6. Hang your wreath from a ribbon. This size wreath will be a little heavy – it’ll weigh as much as your peppermints – in this case, a little over a pound.Tips and Tricks for making Peppermint Wreaths for Christmas Decorations
-
-
-
-
-
- Pin the twisty ends as close to the candies that you can, so that the twisty ends stay fluffy. This will come in handy for filling in gaps as you progress.
- As you go around the wreath, you aren’t going to be able to keep strictly to your pattern of 4 across. In fact, your nice straight-across line is going to be a definite diagonal around row four. Now – you perfectionists out there – don’t panic! It’s not possible to make the pattern perfect. (Yes, I’m talking to myself, too.) You can think of a wreath as two concentric circles. The inner circle is smaller than the outside circle. This means the inside edge of the wreath is much smaller than the outside edge; the outside edge will take more mints to go around it. This is where you get to practice letting go of your perfectionism. Instead, you’re going to just work on fitting the peppermints into the gaps.

-
-
-
-
-
-
- Position the twisty ends to fill in gaps that are too small for peppermints.
- Push the pin in to the twisty end where the cellophane can go as close to the foam wreath as possible. The further you can push the pins into the wreath, the prettier it will look. But don’t worry, not all the pins will push all the way in, and it will look fine. Really, I promise!
- My daughters have bigger fingers than I do. (They’re both taller than me!) They liked using a chopstick to push the pins into the gaps. You might also want to use a thimble to save your finger tips.
-
-
-
-
-
So, file this away or pin it onto your Pinterest Board for next year! And now for the little announcement.Psst! Miri Attwater and all that Glitters will officially launch in mid-January, but it’s avaible now! You can pick up your copy ahead of everyone else at Amazon!
Happy New Year Everyone!
-
-
-
-
-


Your windows are beautifully dressed! Well done to you and your girls. Happy 2014!
Thank you! It was fun.